After successfully running the Google Assistant on the Raspberry Pi, we proceed with initiating a voice command with a Bluetooth remote. The motive behind this is that even though starting a query with a hotword is a great feature, we might not want the Assistant to always listen - especially if you tend to paranoia like I do. We could instead physically start a conversation and preferably from any part of the house.
One quite cheap solution that I found is using Bluetooth remote buttons that cost less than two bucks online and with Bluetooth LE the electricity bill will be happy too. Additionally it is easy to carry around, e.g. with your key ring. Four birds with one stone? So many birds!
Overview
Pretty much the same setup as the previous part.
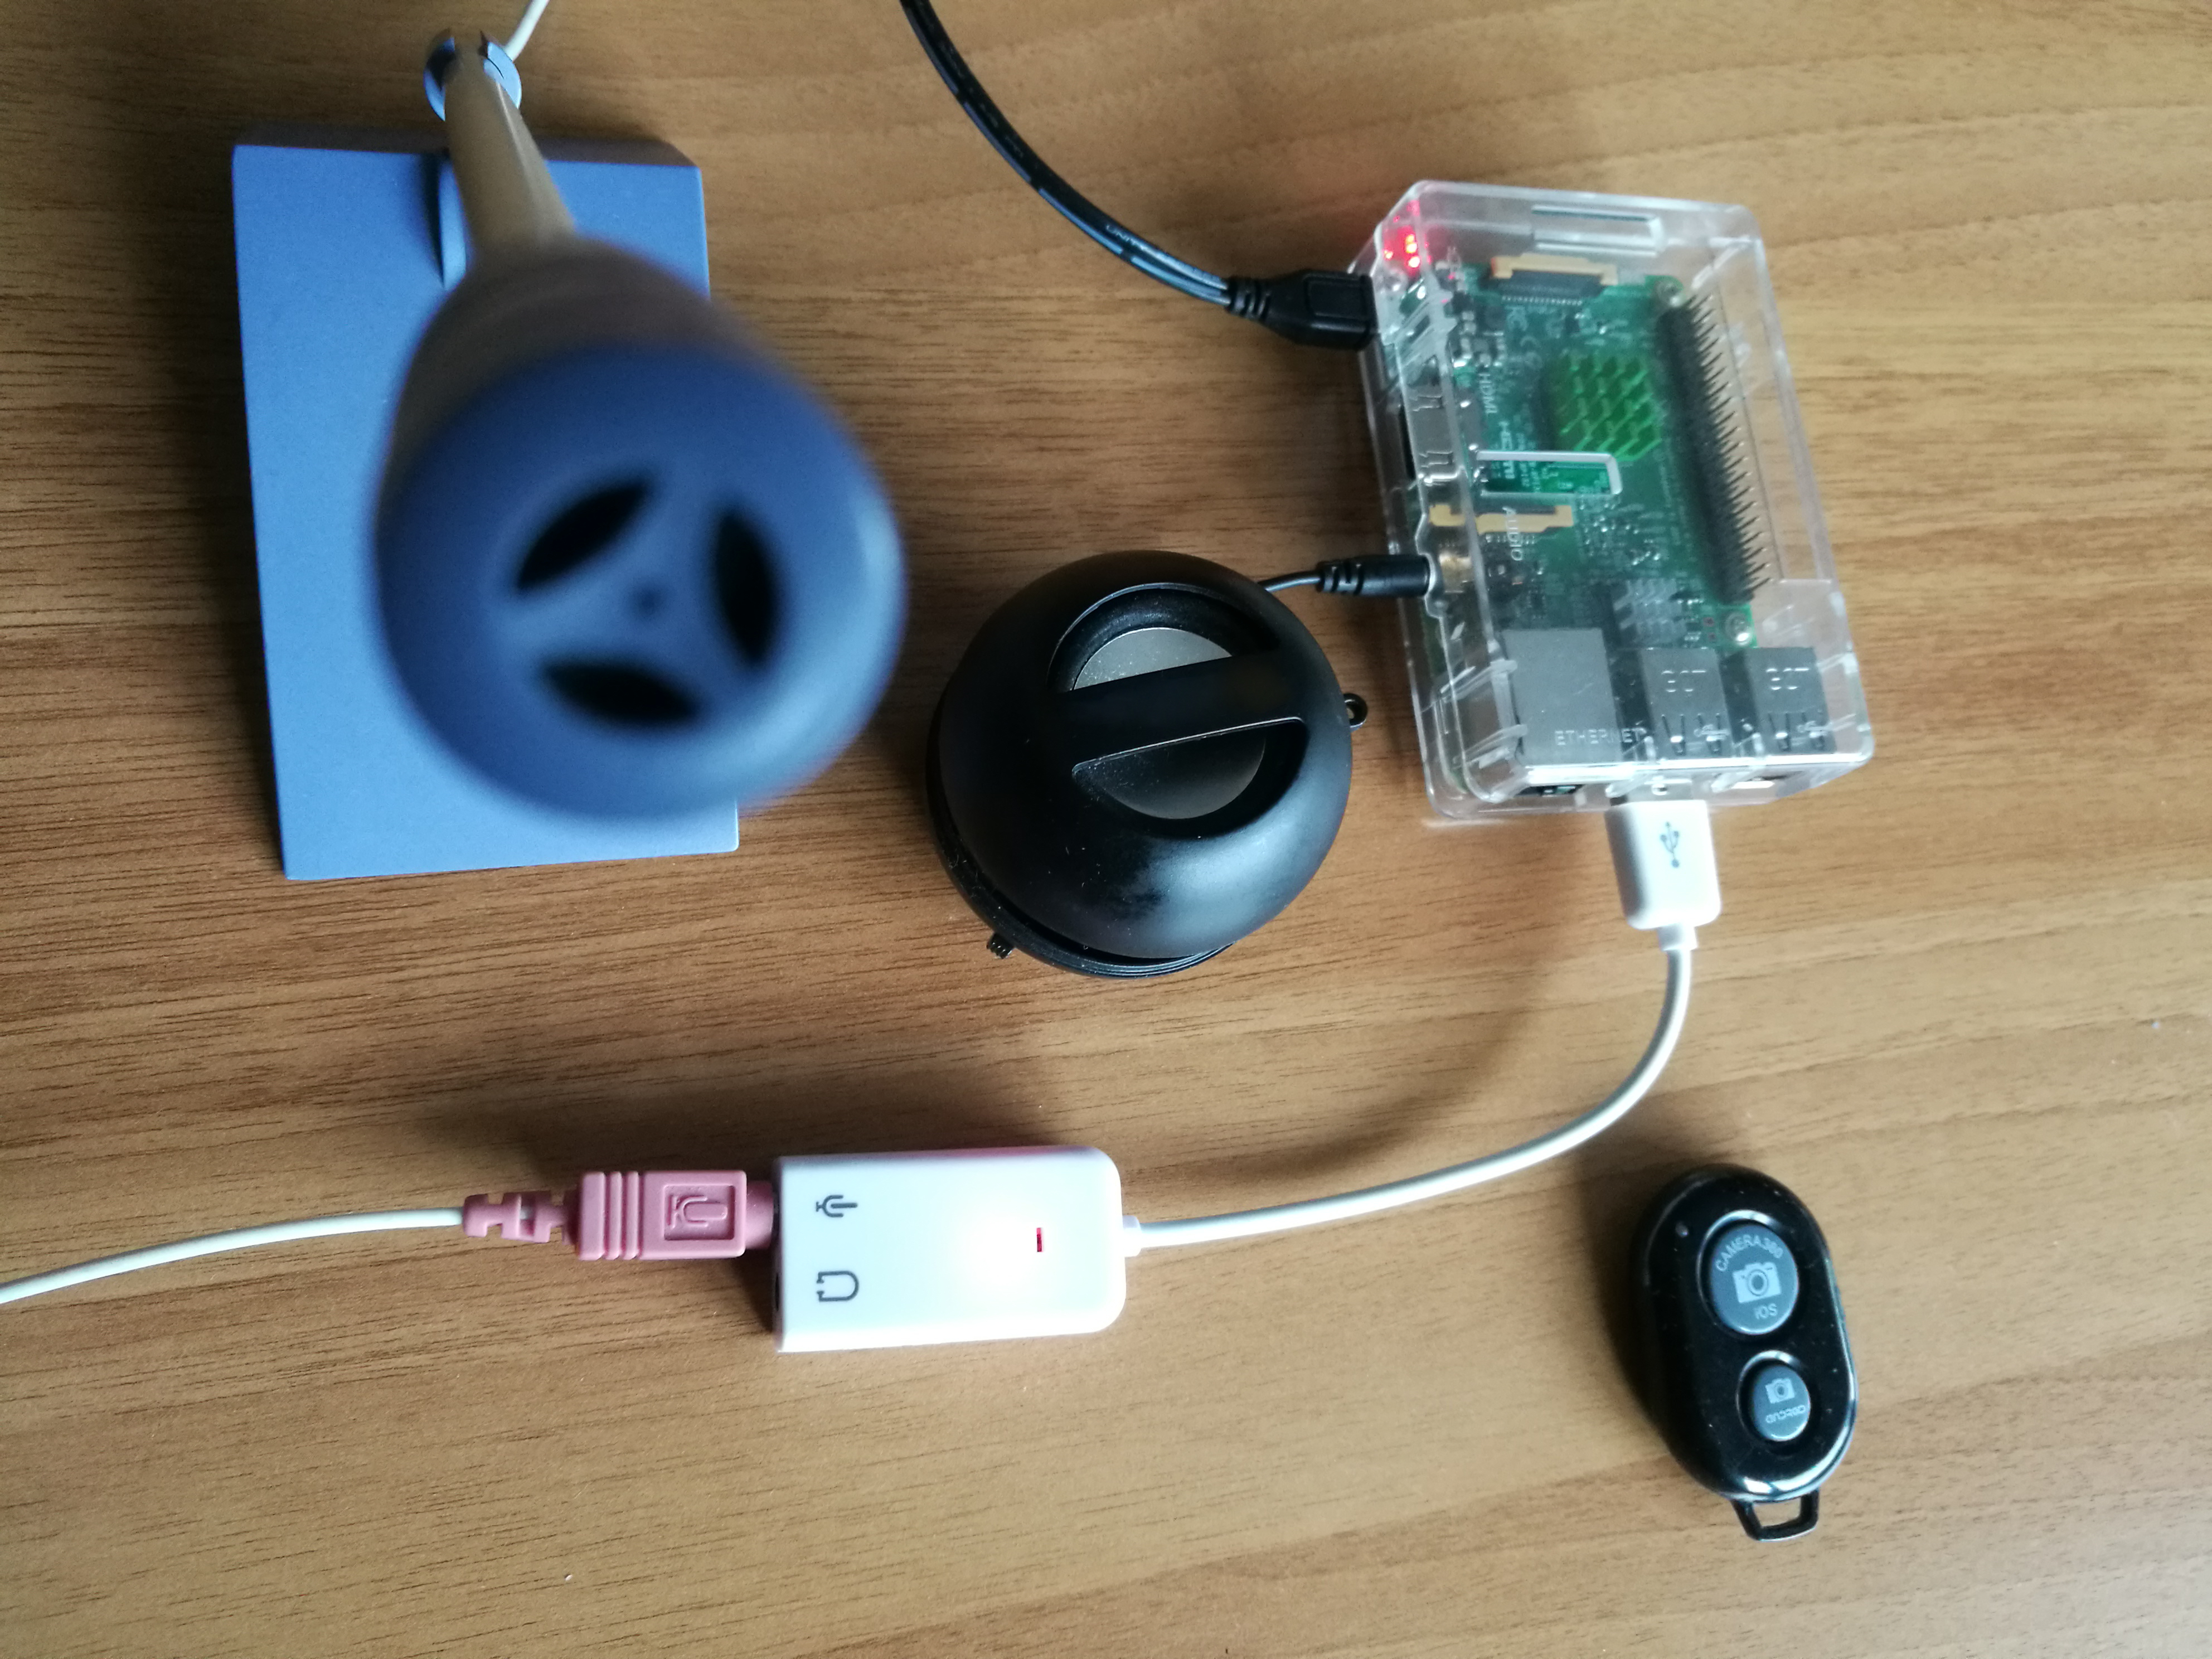
Hardware:
- Bluetooth remote controller (example)
- Raspberry Pi 3 Model B running Raspbian Jessie
- Speakers with 3.5mm jack
- Microphone with 3.5mm jack
- 3.5mm to USB audio adapter to plug the mic into the Raspberry Pi
- Notebook running OSX 10.11
Software:
- a couple of scripts I wrote/modified and uploaded on Github (link)
Step 1: Connect Bluetooth remote
To link our remote we can use the bluetoothctl command in the Terminal. The Bluetooth module should already be installed in the latest release of Raspbian, but if it is not, you can install using sudo apt-get install pi-bluetooth.
We can start scanning for the remote as follows:
$ bluetoothctl
[bluetooth]# agent on
[bluetooth]# default-agent
[bluetooth]# scan on
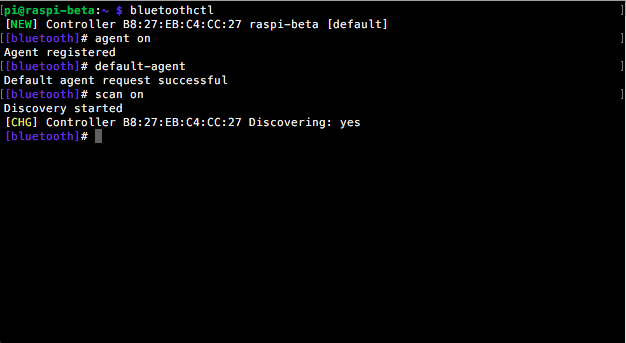
Note: You might need to run sudo bluetoothctl, depending on your user rights.
Note: If the Bluetooth module can’t find anything, try restarting the Bluetooth daemon: sudo systemctl restart bluetooth. Or if it wasn’t running in the first place, use sudo systemctl start bluetooth to start it and sudo systemctl enable bluetooth to run it automatically at boot time.
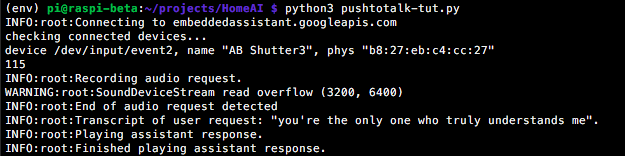
The device should show up as AB Shutter 3 or similar. Let us take a closer look:
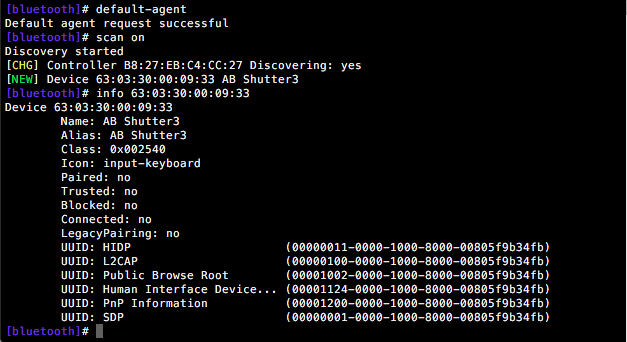
It is registered as a keyboard. We should keep this in mind if we later want to control the Google Assistant with it. Time to connect to it:
[bluetooth]# pair <device MAC address>
[bluetooth]# trust <device MAC address>
[bluetooth]# connect <device MAC address>
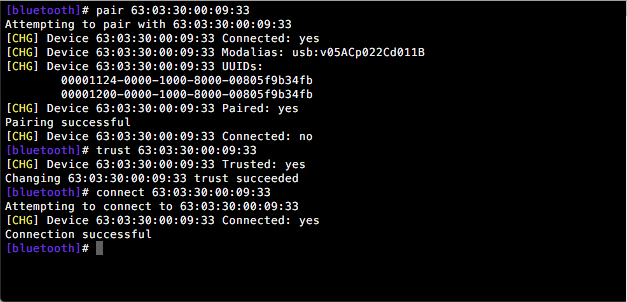
Note: You can use tab completion and don’t need to type in the full address. Use pair and trust for it to automatically reconnect in the future and connect to complete the connection.
Step 2: Test Bluetooth remote input
Now we can test whether the device is properly connected and we can use it like a keyboard. I put together a short Python script which uses the evdev package. Thanks to Jon Burgess for providing the base code!
Switch to the virtual environment which we created while installing the Google Assistant. source <path-to-environment>/env/bin/activate
I have mine in the home directory, so I typed source ~/env/bin/activate. In the environment, we install the evdev package using sudo pip install evdev.
Once that is done, the Python script is fired up:
python3 Test_BT_trigger.py
Note: Make sure that the variable TRIGGER_DEVICE in the script contains the exact name of your device in case yours is named differently.
Comments to script: We basically load a list of input devices connect to our system and look for our trigger device by its advertised name. Once found, the device is grabbed/blocked so that other applications wont be able to use it simultaneously and then iteratively check for key events from it which we print out.

Apparently the keys simulate the “Enter” key and the “Volume Up” key. But that wont be a problem, as the grab() function prevents it from messing with other programs.
Before we continue, there are a couple of issues we should take note of: The device has to already be connected when starting the script, otherwise it will just quit after checking the device list once. Furthermore, when the connected device moves out of range or is turned off, the function read_loop() returns an IOError with “No such device”, which also quits the program. We will fix this when we combine it with the Google Assistant. Almost there!
Step 3: Triggering a Google Assistant query with the remote
Google provides us with a nice example to trigger requests pressing any key. Clone these files and run sudo apt-get install portaudio19-dev libffi-dev libssl-dev and pip install --upgrade -r requirements.txt to make sure you have all the necessary dependencies.
After that, run python3 pushtotalk.py from the files you just copied and press any button to test the sample.
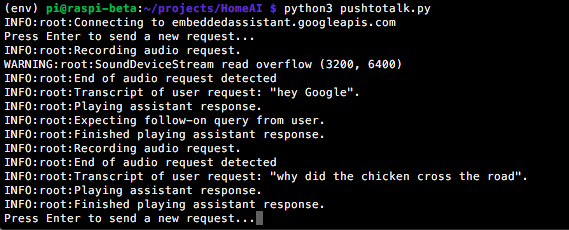
Note: The SoundDeviceStream warning occurs when recorded frames are lost between reading iterations according to the sounddevice documentation. These can be ignored if they only occur when starting the program, as was in my case. If they turn out to be a problem, try increasing the iteration and block size and see if it helps, e.g. python3 pushtotalk.py --audio-iter-size=4000 --audio_block_size=8000. I got less frame losses after this but I couldn’t eliminate them completely.
Once this is done, we can modify the script to exclusively listen to our Bluetooth remote. The main part of interest in the script is in line 314:
...
while True:
    if wait_for_user_trigger:
        click.pause(info='Press Enter to send a new request...')
    continue_conversation = assistant.converse()
...
Instead of waiting for any arbitrary key, this is where the read_loop() function from the evdev package should run. If we receive a trigger event from the remote, e.g. the “Enter” key, the program continues by starting a conversation with the Assistant.
I split our previous Python script into two functions:
get_BT_device_list()which will return the Bluetooth device if it was found, else Nonewait_for_BT_trigger(device)the device from the previous function is listens to the keycode 115 (which is the “Enter” key). We execute this in a “try-except” block to handle the IOError, so the program doesn’t exit once the device disconnects.
The first function is called once every 5 seconds to check if the device is connected. Once it is, we will start polling for the trigger key and start a conversation whenever it is pressed.
I uploaded the code as pushtotalk_BT.py into the Git repo. You will also need BT_trigger.py for to handle the Bluetooth remote.
This concludes the Bluetooth remote feature implementation. I hope you didn’t mind the amount of detail.
See you in the next posts where I will add a custom audio response whenever a request is initiated and then combine the Google Assistant with IFTTT and Home Assistant to run shell commands using your voice!
Leave a Comment
Your email address will not be published. Required fields are marked *